
In the field of construction and renovations, achieving a flawless installation is essential to ensure the quality and durability of the work. Whether you are an experienced professional or a DIY enthusiast, mastering the steps, tools, and techniques associated with installation is crucial to avoid costly mistakes and guarantee a perfect final result. In 2025, the requirements and techniques are evolving, and it’s time to explore the best practices for successful installation. This article will guide you through the various aspects of installation, from mistakes to avoid to emerging trends, while providing you with practical tips and expert advice.
Do you need help with installation and fixing? Find a qualified provider quickly on Helplease and benefit from a customized service to meet all your needs. Discover the professionals near you!To carry out an installation successfully, it is fundamental to follow a set of key steps. The first involves adequately preparing the space and gathering all necessary tools. This includes checking the surface levels and evaluating the dimensions. Next, it is crucial to consult the guides or instructions specific to the materials you are using. Precision in measuring and cutting is essential to ensure that each element fits perfectly. Once the preparation is complete, it is advisable to carry out a temporary installation before proceeding to the final fixing.
Another important step is the application of the appropriate glue or fixings. It is essential to choose the right adhesives that match the materials of your project. Additionally, managing the curing time is vital, as this can influence the final quality of the installation. Do not forget the finishing phase, which may include joints, shims, or necessary touch-ups to ensure an aesthetically pleasing result.
Finally, assessing the result after the installation is completed allows you to detect any potential errors before considering the job finished. By taking the time to conduct quality checks and paying attention to details, you ensure that your installation will be durable and professional.
Before starting the installation, it is critical to adequately prepare the work site. This means clearing the space of all obstacles, ensuring that the surface is clean and dry, and gathering all necessary tools and materials. Proper preparation can significantly improve the efficiency of the work.
Reading and understanding the instructions provided with your materials or tools is a step often overlooked. However, this can prevent many problems. Each product may have specific characteristics that require particular installation methods.
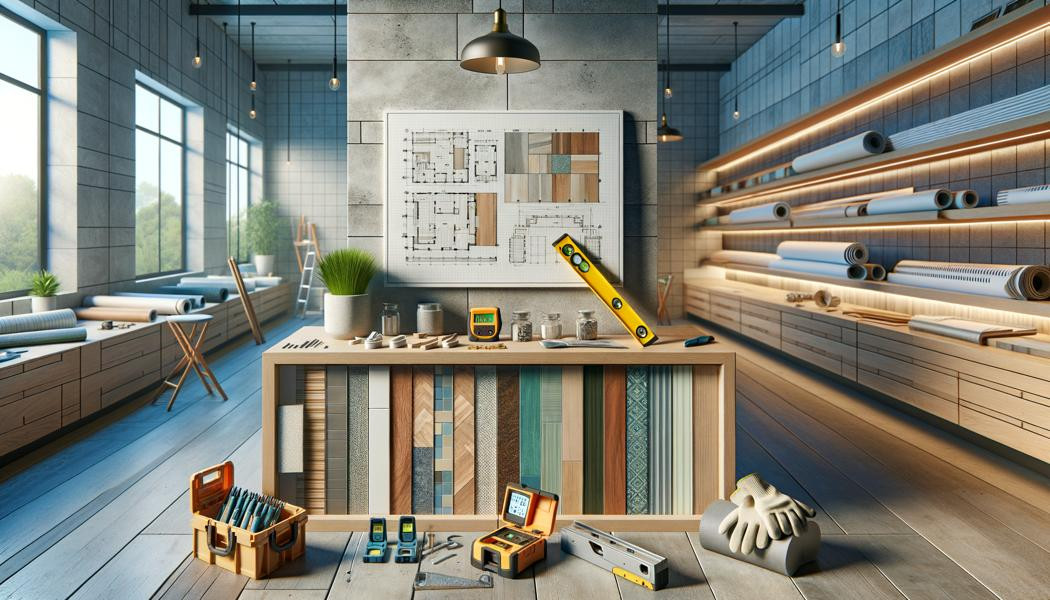
Professionals, are you looking for more clients? Register on Helplease today to offer your services and grow your business. Access a wide customer base in just a few clicks!A good DIYer knows that the quality of the installation largely depends on the tools used. Among the essential tools is the spirit level, which allows you to check that each element is properly aligned. A tape measure is also indispensable for taking precise measurements before cutting. Additionally, a good cutter or saw, suitable for the material to be worked, is crucial for ensuring clean and precise cuts.
A glue gun can also prove to be very useful, especially for lightweight materials or finishes. For fixings, having a variety of screws and plugs suitable for different supports is essential to ensure a strong grip. Do not overlook safety gear, such as gloves and protective glasses, which will protect you while using power tools or handling sharp materials.
Finally, a lifting device, like a ladder or scaffolding, can be essential if you need to work at height. By investing in quality tools, you ensure you have the necessary means to achieve a flawless installation.
Measuring tools, such as the spirit level and tape measure, are essential to ensure precision and efficiency. They should always be at hand during preparation and installation.
Never underestimate the importance of safety equipment. Gloves, protective glasses, or a dust mask are essential for working safely and preventing accidents.
Choosing the right materials is crucial for the success of your installation project. First of all, it is essential to determine the use of the space. For example, in wet areas, prioritize water-resistant materials, such as tiles or certain types of laminates. Moreover, checking the origin and quality of the materials is a factor not to overlook. Choose well-known brands for their reliability and durability.
Another aspect to consider is aesthetics. It is important that the chosen materials harmonize with the style of your interior. For instance, solid wood flooring can bring warmth and elegance, while polished concrete conveys a more modern look. Visit showrooms to touch and see the materials in person; this will help you make an informed decision.
Finally, do not scrimp on costs, but keep in mind that investing in good quality materials often means savings in the long run. Indeed, low-quality materials may require frequent replacements or cause problems during installation.
Consider the technical properties of the materials you are considering. Materials such as drywall are suitable for interior walls, while laminate panels are ideal for more robust surfaces.
Aesthetic harmony is essential for completing a project. Choose materials that match well with the existing decor to create a coherent and pleasant space.
If you are looking for an expert to meet your specific needs, visit Helplease and discover the available providers near you. Simplify your life and find the right professional!Fixing techniques play a central role in the durability of your installation. Firstly, using high-quality adhesives can significantly improve the resistance and longevity of joints. Consider using glues designed for specific applications, such as those for tile or wood installation, which offer better performance than standard glues.
Furthermore, screws and anchors must be chosen based on the supporting material. For example, for plaster walls, use special plugs to ensure optimal holding. For heavy fixings, prefer appropriate hanging systems, such as expansion plugs, which will provide better weight resistance.
It is also advisable to incorporate reinforcements during fixing. For example, when tiling, use a mesh to distribute tensions and avoid cracks. This not only increases durability but also improves the finish of the installation.
Using specific adhesives that are suitable for the materials ensures a solid fixing. This can make all the difference in terms of durability and long-term holding.
Assessing the weight to be supported and the type of support is essential to avoid failures. Always use the appropriate fixings based on the material and weight involved.
When embarking on an installation project, several mistakes can compromise the final result. The number one mistake is not adequately preparing the work area. It is essential to ensure that the surface is clean, dry, and level before installing anything. Inadequate preparation can lead to issues like cracks or misalignment.
Another frequent error is neglecting the drying or curing time of materials. For example, trying to work too quickly after applying an adhesive can compromise the strength of the fixing. It is crucial to respect the drying times indicated by the manufacturer.
Additionally, improvisation during the process can lead to disappointing results. It is important to follow the instructions provided with the materials and to apply the correct techniques. If in doubt, do not hesitate to seek advice from professionals or consult reliable resources.
Rushing through tasks can cause many errors. Take the time to carry out each step correctly to ensure the final quality.
Alignment is crucial for an aesthetic result. Take the time to check at each step to avoid tedious corrections later on.
Preparing your workspace is a key step in ensuring the success of your installation project. Start by clearing the area of all clutter. Ensure that surfaces are clean, dry, and free of debris. Sweeping and vacuuming the area to eliminate any dust that could impact the glue or adhesive can be helpful.
Also, check that the lighting is adequate. Good lighting can make a significant difference when handling materials and checking alignments. If necessary, use additional lamps to ensure that every detail is visible.
Lastly, having all necessary tools at hand to avoid back-and-forth trips can save you time. Organize your space so that frequently used items are easily accessible. Good organization contributes to a smooth and quick execution of the project.
A thorough cleaning of the workspace is essential. This ensures that adhesive materials function optimally and that surfaces are ready to receive the new elements.
Organize your tools so as to avoid distractions and time losses. Having everything at hand creates a working environment conducive to focus.
Professionals, are you looking for more clients? Register on Helplease today to offer your services and grow your business. Access a wide customer base in just a few clicks!Assembly plays a fundamental role in the success of any installation project. Careful assembly ensures not only an aesthetic finish but also the strength and durability of the installation. Poorly assembled elements can lead to structural failures over time, compromising the overall safety.
Additionally, good assembly facilitates the transportation and use of materials. For example, for prefabricated elements, make sure that all connections are solid and meet the manufacturer’s recommendations. This helps avoid future problems during handling or using the materials.
Moreover, it is important to check the fit of each element before proceeding with the final fixing. Proper fit will prevent unwanted movement and ensure that the final structure is stable and secure. Never overlook this step, as it is vital to the success of your project.
Each assembly must be checked for its strength before proceeding. This ensures that the project is built on a solid foundation and will reduce future problems.
Well-executed assembly facilitates the daily use of structures. When everything is in place, the user can fully enjoy the benefits of your work.
Ensuring precision during installation is crucial to avoid complications later on. Use measuring tools such as a spirit level and tape measure to ensure that each element is installed correctly. Constantly checking measurements throughout the process helps avoid placement errors that could compromise the final aesthetics of the installation.
Additionally, take the time to create floor markings or on surfaces to serve as a guide during installation. This marking can be a reference line that will help you ensure that each piece is aligned accurately. Visual markers can make a significant difference in the ease of installation.
Do not hesitate to make minor adjustments during the installation to ensure that everything remains well-aligned. A methodical and patient approach contributes to achieving a professional final result.
Regularly checking levels during installation is paramount. This allows you to detect misalignments early and make corrections before the fixings become permanent.
Markings on the surface as well as using straight lines during installation help maintain correct orientation and facilitate alignment of elements.
To achieve a perfect finish during your installation, follow expert advice. Start by paying attention to details. Small corrections or adjustments can make a huge difference in the final outcome. Do not overlook corners and joints, which are often visible and critical points for the aesthetics of the installation.
Use appropriate finishing tools, such as brushes or rollers for applying finishes. If you are applying a coat of varnish or paint, ensure that the surface is perfectly prepared to avoid imperfections. This includes sanding and cleaning the surfaces before application.
Finally, conduct a final quality control before considering the work finished. Check the alignment, cleanliness, and absence of defects. Taking the time to properly finish a project ensures lasting satisfaction for both you and your clients.
A thorough check before considering a project complete is essential. This involves checking every aspect, from finish to visual consequences, to ensure quality.
Specialized finishing tools enable you to achieve a professional result. Do not underestimate the importance of these products in the finishing process.
Assessing the quality of your installation is an important step in the process. Start by visually inspecting each installed element. Look for imperfections such as offsets, gaps between materials, or irregularities in lines. A careful examination may reveal details that you missed during installation.
It may also be helpful to conduct a resistance test on the fixed elements. For example, gently pull on a tile or perform movements to check the integrity of the assembly. This will allow you to ensure that everything is securely fixed and that there are no risks of failure.
Also, document your observations in case you need to share them with your clients. This can help establish transparency regarding the work done and reinforce client satisfaction.
Conducting simple resistance tests can give you an indication of the quality of your installation. This ensures that the work is durable and meets expectations.
Keeping an inspection and verification journal can also be helpful. This can serve as a reference for future projects and testify to the quality of your work.
The year 2025 is marked by several trends and innovations in the field of installation. One of the most significant is the emergence of eco-friendly materials. More and more professionals are opting for sustainable products that minimize environmental impact while offering performance equivalent to traditional materials.
The integration of advanced technologies, such as augmented reality for installation assistance, is also on the rise. This allows professionals to visualize how materials will be installed and anticipate potential issues even before starting the installation.
Modular installation systems are also gaining popularity, facilitating installations and future adjustments. These systems offer quick and effective solutions for construction industry professionals.
Environmentally friendly materials are increasingly favored, providing a sustainable and high-performing alternative for installation projects.
Augmented reality technologies allow users to better understand the installation process, thereby reducing potential errors.
Problems during installation can occur despite careful preparation. One common problem is the deformation of materials, often due to variations in temperature or humidity. To remedy this, make sure your materials are acclimatized to the environment before installation.
Another frequent issue is when elements do not align correctly. In this case, revisiting measurements and making calculated adjustments to the fixings may be necessary. Use measuring tools to ensure everything is correct.
Finally, if unwanted noises arise post-installation, this may be a sign of a fixing issue. In this case, it is recommended to check each attachment point and ensure they are properly tightened and suited to the support. Do not overlook these details that can affect long-term client satisfaction.
Anticipating temperature and humidity variations is essential. Acclimating materials should be part of your routine before installation.
Alignment problems can often be resolved through adjustments during and after installation. Use the right tools to verify the final precision.
Achieving a flawless installation in 2025 requires meticulous preparation, appropriate tools, and careful attention to detail. By avoiding common mistakes and applying advanced techniques, you can ensure high-quality results that meet your clients' expectations. Moreover, staying informed about trends and innovations in the field of installation will allow you to stand out and offer modern and effective solutions. By integrating these best practices into your process, you are on the right path to succeeding in all your installation projects while providing quality service to your clients.
If you need quick assistance or wish to offer your services, Helplease is your solution! Download the app to access qualified experts or find clients with a click, and simplify your daily life! Available on iOS and Android!