
Repairing a wall may seem like a simple task, but it is essential to master the right filling techniques to ensure a durable and aesthetic result. In 2025, certain filling methods should be avoided, as they can cause more problems than they solve. This article explores the common mistakes to avoid during this repair and the best practices to adopt. We will also discuss the importance of proper filling, recommended materials, and the preparation needed before starting this work.
Do you need help filling a hole? Quickly find a qualified provider on Helplease and benefit from a customized service to meet all your needs. Discover the professionals near you!In 2025, certain filling methods are considered obsolete and even harmful to the durability of walls. For example, using overly abrasive sandpaper to smooth the filling material can damage the wall surface and make repairs visible. Similarly, filling overly large holes with putty can cause cracks when contraction occurs due to temperature changes.
Another technique to avoid is applying layers of filling material that are too thick, which can create adherence and aesthetic issues. Ideally, several thin layers should be applied, allowing time to dry between each application.
Using non-specific products for each type of wall can also lead to failures. Therefore, it is crucial to choose products suitable for the material of your wall, whether it is plaster, concrete, or wood.
Finally, ignoring the overall moisture of the wall before starting work can cause long-term problems, such as the development of mold and deterioration of the filling material.
Using products that are not designed for the type of wall in question can cause damage. For example, a coating intended for an exterior wall should not be applied to an interior wall.
Before any repair, thorough preparation is essential. This includes cleaning the area to be repaired and assessing the damage to be corrected.
Filling a hole in a wall is not just an aesthetic concern: it also has structural implications. An unfilled hole can lead to water infiltration, moisture problems, and weakening of the wall. Additionally, poor filling can make a wall less insulating, thereby affecting the thermal comfort of your interior.
From an aesthetic perspective, an unrepaired hole harms the overall appearance of a room. This can also decrease the value of your property if it is to be sold. Potential buyers will be less inclined to invest in a property that has visible flaws.
An effective filling also helps avoid more expensive repairs in the future by preventing further damage that could occur if the structure is compromised. It is crucial to act quickly to address holes and prevent small repairs from turning into major issues.
Proper filling helps maintain the integrity of your surfaces, ensuring that the environment is not only aesthetic but also functional and secure.
Properly repairing holes in your walls helps ensure the solidity of the structure and avoid more serious damage in the long term.
Good filling helps maintain the insulation level of the room, thus reducing energy costs associated with heating and cooling.
The choice of filling materials largely depends on the type of wall to be repaired. For plaster walls, a plaster-based compound is often recommended, as it offers good adhesion and a smooth finish. Wood putty is ideal for repairs on wooden surfaces, ensuring perfect integration with the surrounding material.
For concrete walls, a filling mortar is preferable, as it is strong enough to withstand the demands of a hard surface. Polyurethane putties are another option, particularly to consider for areas prone to movement or vibration.
It is also advisable to use products containing moisture-repellent agents, especially if the wall is exposed to humid conditions. These products can help prevent infiltration and prolong the durability of the repair.
Finally, ensure that you choose products that offer drying times suitable to your project. Some materials require more time to cure properly, and it is crucial to adhere to these timelines to ensure a professional finish.
For interior walls, using a plaster-based coating is often recommended, as it is easy to apply and allows for a smooth and aesthetic finish.
Wood putty is ideal for wooden surfaces, while filling mortar is perfect for repairs on concrete.
Preparation is a crucial step before starting the filling process. First, it is essential to thoroughly clean the area around the hole to remove any dirt, dust, and debris. This helps ensure good adhesion of the filling material.
Next, assess the depth and size of the cavity. If the hole is deep, consider filling it in several layers to avoid the material from sinking. It is also advisable to use a putty knife to slightly widen the edges of the hole, which facilitates adhesion.
If the wall shows signs of moisture, it is necessary to allow the surface to dry before applying the filling material. Using a dehydrator can also help eliminate residual moisture.
Finally, for more significant repairs, it may be necessary to reinforce the area with a backing or mesh before applying the filling material.
Removing all dirt and dust from the area to be filled is essential to ensure good adhesion.
Measuring the depth of the hole will help you determine how many layers of material you need to apply for a good result.
Filling walls may seem simple, but several common mistakes can compromise the final result. Among these, there is often the application of layers of material that are too thick, which can lead to cracks and deformations. Neglecting the drying time between layers can also cause similar problems.
Another frequent mistake is the use of unsuitable products: for example, using wood putty to fill holes in a concrete wall. This mismatch can make the repair visible and ultimately ineffective.
Furthermore, many people forget to pre-treat the walls in cases of moisture, which can lead to filling failure due to moisture absorption by the material.
Finally, a lack of preparation of the edges of the hole can result in insufficient adhesion, leaving an imperfect and visible finish. It is crucial to ensure proper preparation to avoid these common mistakes.
Applying a layer that is too thick can lead to cracks; it is better to opt for several thin layers.
Failing to allow the material sufficient time to dry completely can compromise the integrity of the repair.
It can sometimes be difficult to determine if a hole requires the intervention of a professional. However, several factors may indicate that it is better to call in an expert. If the size of the hole is larger than a few centimeters or if the wall shows signs of structural damage, it is advisable to contact a professional.
Similarly, recurring moisture or mold problems around the hole are signs that technical intervention is necessary. Professionals can also offer tailored solutions to address these issues in depth.
If you are not confident in your ability to carry out the repair, it is better not to take risks and to call in a specialist. This can save you time and additional costs related to future repairs due to poor filling.
Finally, if the wall is load-bearing or if you have doubts about the nature of the cavity, it is always safer to turn to a qualified professional.
Significant cracks or wall sagging may indicate that the repair requires professional expertise.
Signs of moisture or mold around the hole often indicate a more serious problem requiring expert intervention.
After filling, several signs can indicate a failure of the repair. The most obvious is the appearance of cracks or deformations in the filling material. This may be due to poor application or lack of adhesion.
If moisture stains start to form on the filling, it is a sign that moisture is penetrating through the repair, which may require complete removal of the material and a different approach.
Another sign of failure is the detachment of the material, where the putty or coating begins to come away from the wall. This is often the result of poor prior preparation or the choice of unsuitable material.
Finally, an unsightly visual aspect, such as a rough texture or color differences, can also signal that the filling has not been done correctly, potentially compromising the overall appearance of the room.
Visible cracks in the material are a sign that the repair has not been adequately performed.
The appearance of stains indicating moisture on the filling is an alarm signal that something is wrong.
Some filling methods can indeed cause damage to the wall, particularly through inappropriate application of materials. For example, filling overly large spaces with an unsuitable product can lead to cracks in the wall structure, especially if there are natural movements in the house.
Other methods, such as excessive sanding of the surface, can remove surrounding paint or plaster, making the repair visible and unattractive.
Using aggressive chemical products to clean around the repair area can also degrade the wall material, jeopardizing its structure.
Finally, insufficient treatment against moisture in the wall before filling can promote water infiltration, leading to mold and subsequent deterioration.
Using an unsuitable material for massive filling can cause cracks.
Excessive sanding often results in damage to the surface, visible on the overall finish of the wall.
To prevent cracks from appearing after filling a wall, it is essential to follow a few good practices. First, applying the filling material in several thin layers allows for even drying and reduces the risk of sagging or cracking.
Next, it is important to choose a high-quality product that is well-suited to the type of wall, ensuring that it has properties of flexibility and adhesion.
Be sure to respect the drying times between each application, as rushed drying can compromise the durability of the repair. Additionally, ensure that you prepare the surface properly before applying the material, avoiding interventions on damp or poorly conditioned walls.
Finally, monitor the ambient conditions, as sudden temperature changes can cause cracks to occur after filling.
Applying the filling material in several thin layers reduces the risk of sagging and ensures adequate drying.
Not rushing the drying process is crucial for the durability of the repair.
When filling is not the ideal solution for damaged walls, several alternatives may be available. One of them is using drywall, which can be applied to the most affected areas to allow for a clean and neat finish.
For exterior walls, waterproof coatings can provide additional protection while masking imperfections. This can be particularly useful in areas exposed to humidity.
A common and aesthetic method is to use creative wall painting techniques, such as graffiti or murals, which can hide imperfections.
Finally, it may be preferable to install decorative wall coverings, such as wallpapers or fabrics, providing an aesthetic solution while structurally reinforcing the wall.
Installing drywall is an effective alternative for masking significant damage.
Waterproof coatings protect walls from moisture infiltration while masking defects.
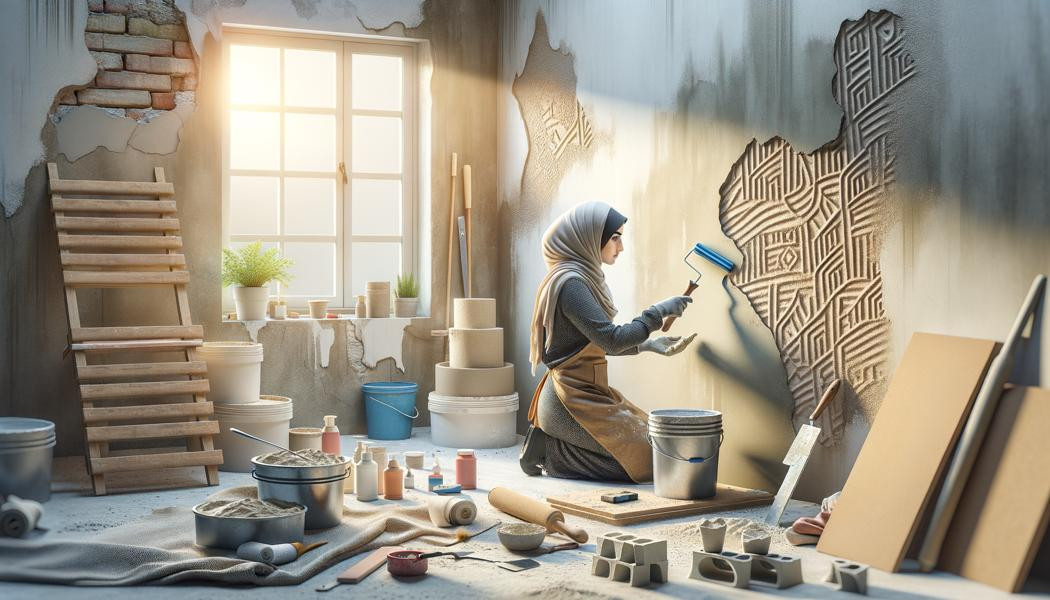
To properly apply filling material, start by gathering all necessary tools, including a spatula, a putty knife, and a sanding panel. Clean the work area and prepare the material according to the manufacturer's instructions.
Apply the material using a spatula to fill the hole, ensuring a flat surface with the wall. Use a putty knife to smooth the edges so that they blend with the surrounding surface.
After application, it is crucial to allow the material to dry completely according to the manufacturer's recommendations before proceeding with any painting or finishing.
Finally, check the final result to ensure there are no inequalities and sand slightly if necessary to achieve a perfectly smooth surface.
A spatula is essential for ensuring precise and effective application of the material.
Make sure to respect the recommended drying times to guarantee an optimal finish.
After filling a wall, it is important to properly prepare the surface before painting. Thoroughly clean the filling material to remove any dust or particles that could hinder paint adhesion.
It is then advisable to apply a primer or undercoat, especially if the filling material is a different color from the final paint. The primer also helps seal the surface and reduces paint absorption.
Finally, choose high-quality paint suitable for your type of wall. Apply several thin layers to achieve an even finish, ensuring adequate drying time between each layer.
By taking these precautions, you ensure that the repaired wall regains its original appearance without traces or imperfections.
Using a primer is essential to ensure good paint adhesion.
Opt for high-quality paints specifically designed for the type of wall you need to treat.
Repairing a wall requires appropriate skills and materials to guarantee a durable and aesthetic result. In 2025, it is crucial to avoid obsolete methods and ensure proper preparation before starting the filling process. Choosing the right materials and applying the appropriate techniques will limit common mistakes and prolong the life of your walls. Keeping in mind the importance of a careful finish can also contribute to the overall value of your property.
Whether you need quick help or want to offer your services, Helplease is your solution! Download the app to access qualified experts or find clients with one click, and simplify your daily life! Available on iOS and Android!