
A dripping faucet is a common nuisance that can lead to significant water expenses and damage installations. This article aims to provide a quick guide and effective way to understand the causes of leaks, the steps needed to repair them, and essential advice for maintenance of faucets. From choosing the right tools to implementing long-term solutions, we cover everything you need to know to keep your faucets in good condition and avoid frequent repairs.
Need help to repair a dripping faucet? Quickly find a qualified provider on Helplease and benefit from a customized service for all your needs. Discover professionals near you!A dripping faucet can have several causes, ranging from worn parts to defective installations. The most common cause of a dripping faucet is the wear of the sealing washer. These washers, usually made of rubber or silicone, are designed to prevent water from leaking. Over time, they may deteriorate, leading to leaks. Another cause may be an issue with the faucet cartridge, which controls the water flow. If this part is damaged, it can also cause unwanted drips.
Water pressure is also an essential factor. Too high pressure can cause leaks at the washers and connections. Other reasons could include dirt or debris stuck in the mechanism, which can prevent proper functioning. It is therefore crucial to determine the real source of the problem before carrying out any repair.
The environment in which the faucet is installed can also affect its integrity. For example, extreme temperatures can cause materials to contract and expand, resulting in microcracks. Poorly insulated showers or excessive vibrations caused by plumbing installations can also play a role. Therefore, it is essential to evaluate the entire installation when you encounter a dripping faucet.
It should also be mentioned that the installation of a faucet can influence its future performance. Incorrect installation, such as forcing parts together or using inappropriate components, can contribute to leak problems. Therefore, regular maintenance and correct installation are crucial to avoid plumbing issues.
Rubber or silicone washers can deteriorate over time, causing leaks. Replacing them is often the first recommended step during repairs.
If your faucet uses a cartridge, damage or wear to this part can also explain why it drips. A defective cartridge needs to be replaced to fix the leak.
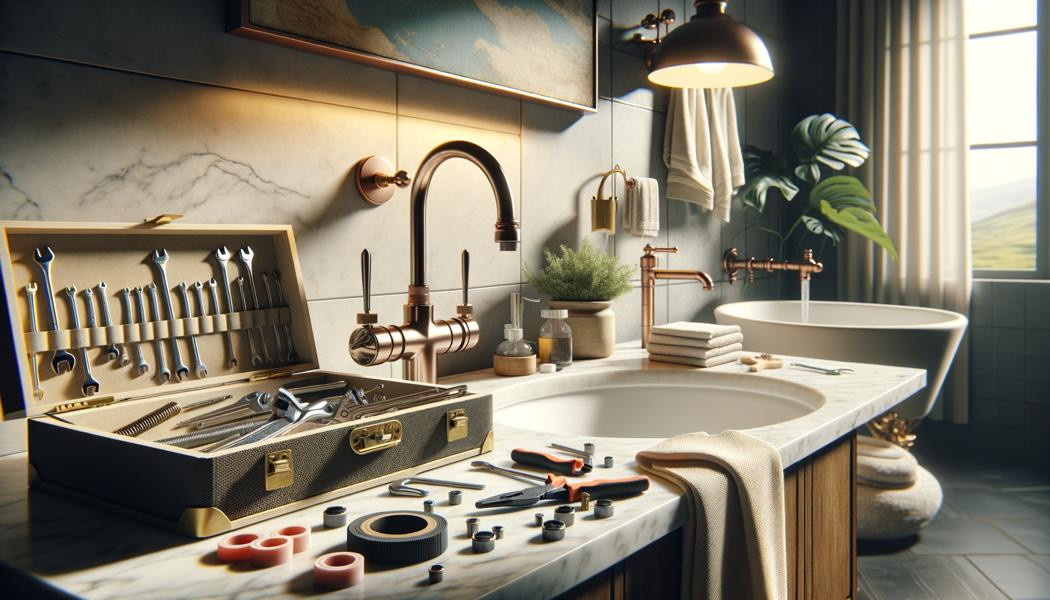
Before undertaking repairs on a dripping faucet, it is essential to have the necessary tools available. You will need an adjustable wrench to unscrew nuts. Flathead and Phillips screwdrivers will also be necessary to access the cartridge and screws. A set of spare washers is also recommended, as the existing washers may be worn or damaged.
A bucket or basin can be useful to collect residual water that may escape while disassembling the faucet. Moreover, a cloth or a roll of paper towels is indispensable for wiping leaks as you work. If you have a cartridge faucet, a special cartridge wrench can make the task easier.
Do not forget lubricants and sealant products. Silicone lubricant, for example, can help make the installation of new washers much smoother. As for sealant products, they help ensure a better seal between plumbing parts, which is essential to prevent future leaks.
Finally, for some more advanced repairs, a user manual or a guide on plumbing repairs can be extremely useful. These resources provide detailed instructions and practical tips to ensure you carry out the repair correctly and efficiently.
A screwdriver, an adjustable wrench, spare washers, and a bucket are all essential for the repair job.
Always keep silicone lubricant and sealant products in stock to ease the replacement of washers.
Understanding the type of faucet is crucial when making repairs, as each type has a distinct mechanism. Compression faucets, for example, have two handles and use a rubber washer. Other types, such as cartridge faucets, often have only one handle that moves up and down to control the flow. Ceramic disc faucets, on the other hand, are renowned for their durability and efficiency in sealing.
To identify the type of faucet you have, start by examining the handles. If the handles are often cold to the touch and get loose, it's likely a compression faucet. Cartridge faucets are often more modern and easier to use—a single turn of the handle can modulate the flow. Ceramic disc models, on the other hand, are less likely to leak, but if they start leaking, their repair may require more advanced knowledge.
It is also advised to look at the internal parts when you disassemble your faucet for repair. Take note of the shape and size of the parts to avoid buying replacement parts that do not fit your model. This may also include precise measurements of washers or cartridges for optimal replacement.
If you still have doubts about the type of faucet, a quick online search or advice from a hardware store seller can be very helpful. DIY stores can also guide you regarding the specifics of the models available on the market.
Knowing the types of faucets such as compression or cartridge models will help you better prepare your repairs.
Observing the internal parts during disassembly helps you better understand how it works and which parts need replacing.
Disassembling a faucet may seem intimidating, but just follow a few simple steps. The first is to shut off the water. Make sure to close the shut-off valve under the sink or washbasin. This will prevent water splashing during disassembly. Next, place a bucket under the faucet to collect any residual water.
After that, remove the handle from the faucet. This may require unscrewing a screw hidden under a decorative cap. Once the handle is off, you'll have access to the internal mechanism. Then use your adjustable wrench to unscrew the nuts holding the faucet in place. This gives you access to the cartridge or washers.
Once you have disassembled the faucet, examine the internal parts to determine which need to be replaced. Take photos if needed to help you during reassembly. It's also wise to thoroughly clean the inside of the faucet before installing new parts, removing any debris that could interfere with the new washer or cartridge.
Finally, once all these steps are completed, you'll be ready to install the new parts. Follow the reverse order for reassembly and make sure everything is securely tightened before turning the water back on.
Prepare your workspace by shutting off the water and protecting the area with a bucket.
Be careful during disassembly, noting how the parts are assembled to make reassembly easier.
Replacing a washer or cartridge is often the solution for a dripping faucet. To do this, start by removing the faucet to access the part to be replaced. Carefully extract the worn part, making sure not to damage other components. Once the part is removed, examine its condition to know what type of washer or cartridge to buy as a replacement.
Obtain the proper washer or cartridge from a hardware store. It's advisable to take the old part with you to avoid confusion. Once you have the right part, slightly lubricate the new washer or cartridge with silicone lubricant to ease installation and improve sealing.
Next, insert the new part, following the reverse process of disassembly. Make sure everything is correctly in place and threads are properly aligned before tightening the nuts. This ensures that the washer won’t be compressed unevenly, thus preventing new leaks.
Finally, slowly turn the water back on and check for leaks. Once this step is validated, you will have completed the repair successfully. It's an excellent way to save water and prevent more serious issues.
For replacements, make sure you have the appropriate parts for your faucet model.
Use lubricants to ease insertion of new washers or cartridges during the repair.
Reassembling a faucet must be done with care. Once the washer or cartridge is replaced, start by reinserting the faucet into its designated slot. Make sure all components are well aligned before applying the nuts.
Gradually tighten the nuts using an adjustable wrench, making sure not to overtighten as this could damage the faucet and cause leaks. When replacing the handle, also check that the screw fits its slot. This is crucial for the proper functioning of the handle.
After assembling all elements, slowly open the shut-off valve to restore water. This will prime the faucet and verify that it does not leak. Always check all washers and assembly points to ensure there is no water leaking.
If everything works correctly, the faucet should be operational. Neaten the installation by putting the decorative caps back in place to restore the appearance of the faucet.
Be sure not to overtighten the nuts and check the handle functions properly after assembly.
Carefully test the faucet after assembly, paying attention to any potential leaks.
When repairing a faucet, several mistakes can compromise the success of the operation. One of the most common mistakes is neglecting to turn off the water before starting. This can lead to splashes and water damage. Always make sure to turn off the water for safe work.
Another classic mistake is not having the right tools. Working with inappropriate or neglected tools can make the job harder and lead to mistakes. Invest in a good set of tools to make your task easier.
Sometimes people forget to thoroughly inspect the parts to be replaced, which can lead to replacing components in good condition. Always check the condition of each part before proceeding with replacements. This can save you money in the long run.
Finally, not following the instructions can cause inconvenience. It's crucial to smooth out the steps of disassembly and assembly to avoid losing parts or assembling them incorrectly.
Forgetting to turn off the water supply can cause unwanted water damage.
Using inappropriate tools can make repairs more complicated and reduce the effectiveness of the work.
Once repairs are completed, it is essential to test the faucet to ensure it no longer leaks. Start by slowly turning the water supply on after reassembling the faucet. Carefully observe if water is seeping through washers and bad connections.
Let the faucet run for a few minutes to check if there are any persistent drips. Make sure to examine both the top and bottom of the faucet, as leaks can occur in different places.
For a thorough check, use paper towels or a cloth to wipe dry around washers. This way, you'll be able to spot any water drops that might escape quickly. If any leaks are detected, you will probably need to reopen the faucet and adjust the concerned parts.
If the faucet runs without leaks for several minutes, you can be assured the repair was successful. This reduces the risk of damaging other plumbing elements and helps keep your home in good condition.
Slowly turn the water on and pay close attention to the faucet for any visible leaks.
Wipe the underside of the washers with absorbent paper to detect potential leaks.
Besides leaks, a faucet can also encounter other problems that impact its functioning. For example, a faucet that delivers water slowly may be suffering from debris or dirt accumulated in the faucet body or cartridge. This can often be solved with a simple disassembly and cleaning.
Whistling or vibrating noises, usually caused by water pressure problems or loose parts, may also indicate a problem. In this case, you may need to check the water pressure or tighten the connections.
Corrosion problems can also affect older faucets. This can make some parts fragile and prone to breaking. In these cases, it is often best to completely replace the faucet to prevent further possible damage.
Finally, oxidized faucets may have leaks or cracks, increasing the risk of water leakage. If a faucet begins to show signs of oxidation, it’s recommended to do a quick maintenance or replace it.
Blocked debris can cause insufficient water pressure or persistent upstream drips.
High-pitched noises or vibrations can indicate water pressure problems or loose connections.
There comes a time when it is better to call a professional plumber. If the necessary repairs seem beyond your skills or require special tools, it is wise to call in a professional. They have the expertise required to ensure the job is done properly and safely.
Moreover, if the issue extends beyond the faucet, such as a leak in the pipes or water pressure problems throughout the house, a professional plumber will be able to diagnose the problem more broadly. This can help avoid significant property damage that could arise from a poor assessment.
If you tend to frequently experience problems with your faucets or plumbing, it's also wise to consult a professional for a complete assessment of your plumbing system. This will help identify underlying issues that may require immediate attention.
Finally, if you are unsure of your ability to make a proper repair, don’t hesitate to ask for help. It’s better to invest a little in a plumber than to attempt a failed repair that could cost much more in the long run.
When repairs become too tricky, a plumber can guarantee effective solutions.
Leaks in pipes or water pressure issues throughout the home often require professional attention.
Regular maintenance of your faucets is essential to avoid future leaks. Firstly, do regular visual inspections. Check washers and connections for signs of wear or oxidation. By catching problems early, you can save on expensive repairs.
Also, regularly clean your faucets to remove dirt and mineral deposits that could affect their performance. Using a mix of vinegar and water is an excellent way to descale surfaces without damaging the material.
Finally, monitor the water pressure in your home. If you observe that the pressure is too high, installing a pressure reducer could protect your plumbing from future damage.
Lastly, know that pre-emptively replacing washers and cartridges can also be a beneficial measure. Replace them every few years, even if you don't see any leaks. This can truly extend the lifespan of your plumbing installations.
Periodically check washers and connections for signs of wear that could cause leaks.
Clean your faucets with a mix of vinegar and water to prevent limescale deposits.
Choosing a quality faucet is imperative to ensure long-lasting use. First, opt for recognized brands with good reviews. Investing in a quality product can reduce future leaks and repairs. Look for faucets made from durable materials such as brass or stainless steel, which are less likely to corrode.
Also, ensure that the faucet comes with a suitable warranty. This gives you an indication of the product’s durability and the manufacturer's confidence in their product. A warranty generally covers manufacturing defects but not normal wear, protecting you from possible problems.
Finally, consider the style and features of your faucet. Choose one that fits your aesthetic while being functional. A single-handle faucet, for example, may offer more convenience and control than a two-handle model.
Don't hesitate to read customer reviews on different models before making your final choice. This can provide insight into the faucet’s performance and common problems other users experience.
Selecting respected brands often ensures better quality and durability.
A good warranty is a sign of the manufacturer's confidence and protects you from defects.
Repairing a dripping faucet is a doable task that can help you save on your water bill and avoid more serious plumbing problems. By understanding the causes of leaks, using the right tools, and following the proper steps, you can easily restore your faucets’ functionality. It’s also crucial to take preventive measures to ensure their durability. If the problem turns out to be too complex, do not hesitate to consult a professional plumber. Regular maintenance and thoughtful choices when purchasing new faucets will help keep your plumbing in perfect condition.
Whether you need quick help or want to offer your services, Helplease is your solution! Download the app to access qualified experts or find clients with a single click, and simplify your daily life! Available on iOS and Android!