
In a world where bathroom maintenance is essential to preserve both its appearance and functionality, grout renovation proves to be an unavoidable task. The grout, often exposed to wear and humidity, plays a crucial role in the waterproofing of your bathroom. In 2025, it is vital to approach this renovation without mistakes in order to avoid unnecessary expenses and guarantee optimal durability. This article will guide you through every step, from understanding the importance of renovating grout to the techniques to adopt. Whether you are a beginner or experienced, you will find practical and precise tips for a successful renovation of your bathroom grout here.
Do you need help renovating your bathroom grout? Quickly find a qualified service provider on Helplease and benefit from a custom service to meet all your needs. Discover professionals near you!The renovation of bathroom grout is not just a matter of appearance; it is essential for maintaining the structural integrity of your space. Worn grout can lead to water infiltration which, in the long term, causes considerable damage such as mold, and degradation to the walls and surrounding surfaces. By regularly renovating your grout, you prevent costly repairs in the future.
Moreover, a bathroom with well-maintained grout presents an image of cleanliness and care. This can not only impact your personal comfort but also the perceived value of your property. A neat and well-kept space is always more attractive to visitors or potential buyers.
It is also important to consider health, as damaged grout can become a haven for bacteria and mold. Over time, this can affect air quality in your home, especially if you suffer from allergies or respiratory issues.
Finally, choosing modern materials during the renovation of your grout can also improve the durability and energy efficiency of your bathroom. For example, new grouting products have better resistance to humidity and mold growth, enhancing the hygiene of your environment.
Regular renovation of grout ensures a clean and appealing look, significantly transforming the appearance of your bathroom.
Repairing worn grout prevents water infiltration that could cause severe material damage that is difficult to address.
Grout in good condition limits the development of mold and bacteria, thus improving air quality.
New types of grout promise longer lifespans and increased resistance to moist conditions.
There are several early warning signs that may alert you to the need to renovate your bathroom grout. These include the appearance of cracks, discoloration, or visible detachment, all of which may indicate that the grout has hardened or deteriorated.
Furthermore, if you notice persistent dampness on walls or floors, this could mean the grout is no longer serving its waterproofing function. Signs of mold or yellowish stains around the grout are also clear indicators that intervention is required.
It is also recommended to inspect the grout after each bathroom cleaning. If water appears to pool or if moisture lingers long after use, this may signal a waterproofing issue due to worn grout.
Finally, do not wait for these problems to become severe. Preventive maintenance allows you to detect deterioration before it leads to more serious health or structural issues.
Cracks often mark the beginning of grout wear, requiring a quick renovation to prevent worsening.
If you observe frequent dampness around the grout, this is a sign water is infiltrating, making renovation necessary.
Mold stains are not only unattractive, but are also harmful to your health, indicating a renovation is necessary.
If water stagnates around the grout after cleaning, it may indicate a failure that should be addressed quickly.
The choice of materials for renovating your bathroom grout is crucial to ensure effective waterproofing and increased durability. The two most common types are silicone and acrylic. Silicone is widely used due to its flexibility and water resistance, making it ideal for moisture-prone areas.
On the other hand, acrylic is often preferred for its efficiency in less damp areas and its ease of painting, although it is less resistant to mold. Given the differing properties of these materials, your choice will depend on the specific application and environmental conditions in your bathroom.
It is also important to consider additional materials such as preformed PVC or rubber grout, which can offer a quick solution for hard-to-reach areas. These materials are often useful in renovation projects where simplicity and speed are priorities.
Finally, when purchasing, make sure to choose products specifically formulated for moist environments. Many manufacturers offer anti-fungal grout that prevents mold formation and ensures a longer lifespan.
Silicone is flexible and water resistant, while acrylic is easily painted and ideal for dry areas.
For specific applications, PVC or rubber grout offers a practical and effective solution.
Using materials specially designed for moisture can enhance durability and prevent the formation of mold.
Also consider eco-friendly material options that are available on the market, responding to the growing demand for sustainability in home maintenance.
Preparing the surface before renovating your grout is an essential step to ensure good adhesion and a lasting finish. Start by thoroughly cleaning the area around the existing grout. Use a suitable cleaner to eliminate all dirt, soap, or residue from previous products.
Next, check the condition of the underlying surface. If you spot damage such as mold or standing water, address these issues before continuing. Applying an antifungal product can be effective in removing any trace of mold.
Once the surface is clean and dry, remove the existing grout. Use a utility knife or suitable tool to cut the grout, being careful not to damage the surrounding surfaces. After that, clean the surface again to remove any grout residue.
Finally, ensure that the area is completely dry before applying the new grout, as moisture can compromise adhesion.
Removing all dust and residue from previous products ensures a clean surface for durable grout application.
Checking the integrity and cleanliness of the underlying surface is vital for a successful renovation.
Use a dedicated tool to remove old grout carefully, avoiding damage to the surrounding surfaces.
The area must be perfectly dry before applying the new grout, as moisture can affect adhesion.
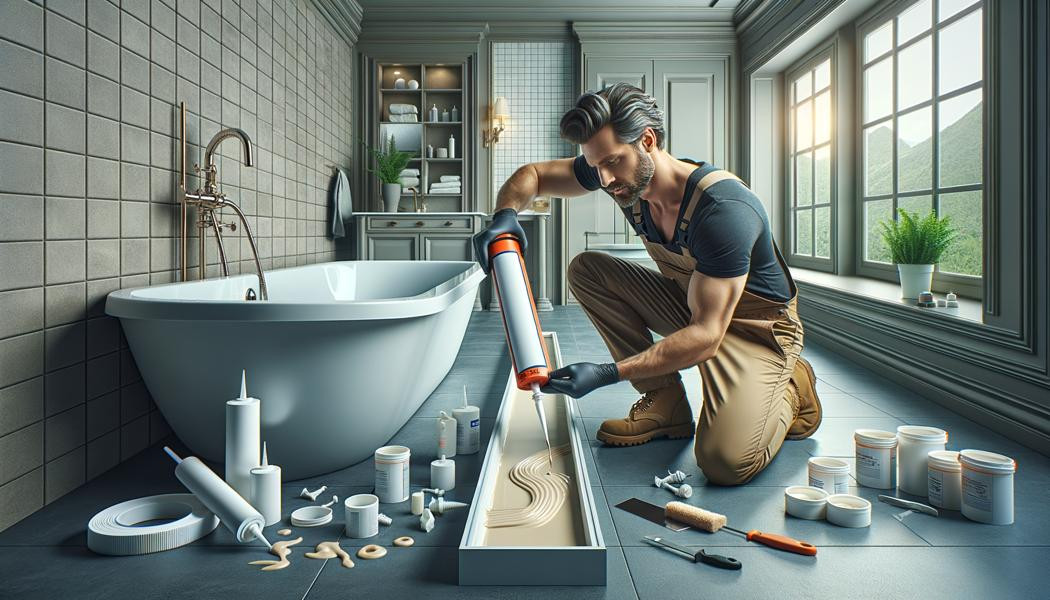
Once the surface is prepared and the grout chosen, applying the new grout is the final crucial step. Start by preparing your caulking gun, inserting the grout tube, and cutting the nozzle at an appropriate angle to control the flow. Hold the applicator at about a 45-degree angle to create an even application.
Apply the grout in a continuous line, ensuring you fill all cavities to avoid voids that could become weak points. Once the grout is applied, it is necessary to smooth the surface for a clean finish. A smoothing tool or simply your finger can be used for this.
It is also important to follow the manufacturer’s instructions regarding drying time before using the bathroom again. Respect curing times to guarantee the best possible waterproofing.
Finally, conduct a final inspection to check for holes or cracks and ensure the grout is smooth and flawless.
Preparing the caulking gun and cutting the nozzle correctly makes it easier to apply the grout evenly.
Be sure to apply the grout in one single continuous line to avoid weak points in sealing.
Smoothing the grout just after application is important for an aesthetic and effective result.
Do not rush the drying process to ensure the durability of the applied grout.
To remove old grout without damaging the surrounding surfaces, it is best to start with the appropriate tool. Use a utility knife or scraper with a thin blade to carefully cut along the edges of the grout. This allows you to detach the grout without scratching the surrounding surface.
Once you have cut the grout, you can gently extract it. In some cases, it may be necessary to apply a bit of solvent to help loosen the grout. It is essential to work slowly and at a comfortable room temperature to make the process easier.
After removing the grout, clean the area with a damp cloth to remove any residue. Pay attention to ceramic or glass surfaces, which can be easily scratched if you are not careful.
Finally, consider using an adhesive remover if necessary before proceeding with the renovation of the grout.
A utility knife or scraper with a thin blade allows you to gently remove grout without damaging the surface.
Slowly remove already worn grout to avoid splashes or damage to neighboring materials.
Be sure to remove all grout residue, leaving a clean surface ready for new application.
Using the right methods to eliminate adhesive residue can make surface preparation for new grout easier.
Several tools are essential for successful renovation of bathroom grout. A caulking gun is vital for applying grout precisely and evenly. In addition, a utility knife or scraper is required to carefully remove old grout.
A smoothing tool is also recommended. This will help you achieve a clean and smooth finish, essential to avoid visible imperfections. Protective gloves are advised to keep your hands clean and avoid contact with potentially irritating substances.
Finally, a sponge or soft cloth will be useful for cleaning the areas around the grout before and after application, thus ensuring good adhesion.
A tape measure can also be useful for taking measurements if you need to adjust special grout or joint plans in tight spaces.
A caulking gun ensures precise application and helps prevent messy spills.
Essential for removing existing grout without damaging the surrounding surfaces.
For achieving a clean, professional finish during grout renovation.
Wear gloves and safety goggles to avoid any undesirable effects during application.
Preventing mold during grout renovation in the bathroom requires a preventive approach and the right choice of materials. To start, choose antifungal grout products. These grouts are specially designed to resist humidity and prevent the growth of mold.
Next, make sure the bathroom is properly ventilated. Good airflow reduces ambient moisture, making the environment less favorable for mold. Installing exhaust fans can be a wise long-term investment.
Regular cleaning of the bathroom also helps prevent mold build-up. Use appropriate cleaning products that remove spores present on surfaces before they become problematic.
Finally, check the condition of the grout regularly. If you notice signs of failure, consider repairing them quickly to prevent mold formation.
Use grout specially formulated to resist mold to increase longevity.
Install ventilation devices to ensure proper airflow and avoid excessive humidity.
Regular bathroom maintenance will prevent the growth of mold and bacteria.
Inspect the grout regularly for signs of deterioration so you can act quickly if needed.
Silicone and acrylic grout are the two most commonly used for grout renovation in bathrooms, but they meet different needs. Silicone is particularly appreciated for its flexibility and water resistance, which makes it an ideal choice for areas exposed to high humidity.
On the other hand, acrylic grout offers better paintability, making it more suitable for applications where appearance is important. However, these grouts are generally more rigid and less elastic, making their use less optimal in areas exposed to moisture changes.
Professionals often prefer silicone for its durability against mold, while acrylic may be chosen for work requiring a painted finish. A hybrid option is available on the market, combining properties of both types to meet different needs.
Essentially, your choice should depend not only on your specific application but also the environment in which you work.
Silicone grout is flexible and ideal for surfaces exposed to water.
Acrylic grout allows for a painted finish, adding a polished look.
Some hybrid grouts offer properties of both materials, meeting varied needs.
It is crucial to choose based on the environment of application to guarantee optimal performance.
To ensure the durability of new bathroom grout, it is important to adopt regular maintenance habits. First, gently clean the grout, avoiding abrasive products which could damage it. A simple mix of water and white vinegar can be effective to clean without risking to weaken the grout.
Next, keep the bathroom well ventilated. Excess moisture promotes the growth of mold, so it is advisable to use an exhaust fan or open a window after every shower to promote airflow. Additionally, a dehumidifier can be a great investment for particularly damp spaces.
It is crucial to regularly monitor the condition of the grout. If you notice signs of dryness or cracks, consider treating them immediately before the problem gets worse. Small preventive repairs can avoid costly renovations in the long run.
Finally, avoid overloading the grout by placing heavy objects or bathroom equipment directly on the grout, as this may cause cracks or damage.
Opt for non-abrasive cleaners to maintain and preserve grout durability.
Maintaining good ventilation reduces moisture and prevents mold on grout.
Frequently check the condition of the grout to prevent minor problems from becoming major renovations.
Avoid putting heavy objects on the grout to extend its lifespan.
In general, it is recommended to renovate bathroom grout every 5 to 10 years, depending on use and environmental conditions. Bathrooms used regularly may require more frequent attention, especially if signs of deterioration appear earlier.
It is also wise to monitor the behavior of the grout after installation. If you notice cracks, moisture, or mold before the recommended period, don’t wait; act immediately to avoid more severe damage.
As a preventive measure, a simple visual inspection once a year can help you spot potential problems before they require complete renovations. Adapting your maintenance routine based on use and the condition of the grout will help extend its life.
Finally, do not forget that the choice of materials during initial renovation can also influence how often you need to replace or patch them.
Renovate grout every 5 to 10 years, depending on the condition and use of your bathroom.
Regularly inspecting the condition can prevent problems before costly repairs are needed.
Routine checks once a year help you keep track of the general condition of your grout.
Choosing high-quality materials can prolong grout lifespan and reduce the frequency of required renovation.
When renovating bathroom grout, certain common mistakes can compromise your efforts. One of the main mistakes is not cleaning the surface properly before applying new grout. Skipping this step can cause poor adhesion and premature failure.
Another mistake is not respecting drying times recommended by the manufacturer. Applying water or using the bathroom too soon can ruin your work. Also avoid applying too much grout at once; excessive application can cause uneven drying time and later cracks.
Moreover, ignoring the necessary specifics for each area (like differences between silicone and acrylic use) is a common mistake that can impact the longevity of your grout. Each type of grout has specific properties that must be respected for maximum effectiveness.
Finally, don’t neglect after-renovation maintenance; failing to check the grout regularly after renovation may delay spotting potential defects.
Inadequate cleaning before application will harm grout adhesion and its lifespan.
Overlooking drying times can compromise the integrity of the newly applied grout.
It is better to apply thin layers and see if touch-ups are needed rather than overloading the grout.
Choose the type of grout best suited for each area to ensure your project's success.
Renovating your bathroom grout is a crucial undertaking to preserve the strength and aesthetics of this essential space. By following the right steps, choosing suitable materials, and avoiding common mistakes, you will extend the lifespan of your grout and enhance your bathroom’s appearance. In 2025, refresh your grout by following this advice and enjoy a beautiful, healthy bathroom for years to come.
Whether you need quick help or you want to offer your services, Helplease is your solution! Download the app to access qualified experts or find clients in one click, and simplify your daily life! Available on iOS and Android!