
When it comes to DIY, filling a hole is a common but crucial task. Whether for small household repairs or larger renovations, knowing how and with which tools to fill a hole is essential to ensure a flawless finish. This article will guide you through the types of holes you may encounter, the essential tools for patching, and the steps to follow to get the job done successfully. Thanks to these tips, you will be able to fill a hole effectively and professionally.
Need help to fill a hole? Find a qualified provider quickly on Helplease and benefit from a tailor-made service to suit all your needs. Discover professionals near you!The holes you frequently encounter can vary in size and type. Among the most common are holes left by nails or screws in walls, often due to decoration work or shelf mounting. These small damages can be easily repaired, but they require special attention to achieve a perfect finish.
Another common type of hole is one that results from natural wear of the material, particularly in places like ceilings or wall corners. These holes can be caused by moisture, insects, or even changing weather. In these cases, it is vital to fill the hole to avoid further damage.
Holes in plasterboard walls are also frequent, especially in houses with children or pets. Impacts can cause cracks or holes that, if untreated, may become larger structural damage. The good news is that there are several methods to fill this type of hole effectively.
Finally, there are holes caused by cracks in harder materials such as concrete or brick. These holes may require special products to ensure proper adhesion and durability. It is therefore crucial to correctly identify the material type before proceeding with the repair.
Holes created by nails and screws are often small, but they are very frequent in households. For these types of holes, a simple filler can often be enough. It is important to smooth well after application to make painting easier later.
Cracks, on the other hand, may require a more thorough inspection. Sometimes, they are a sign of structural problems. It is then recommended to fill the hole after assessing the underlying causes and consider more extensive repairs if necessary.
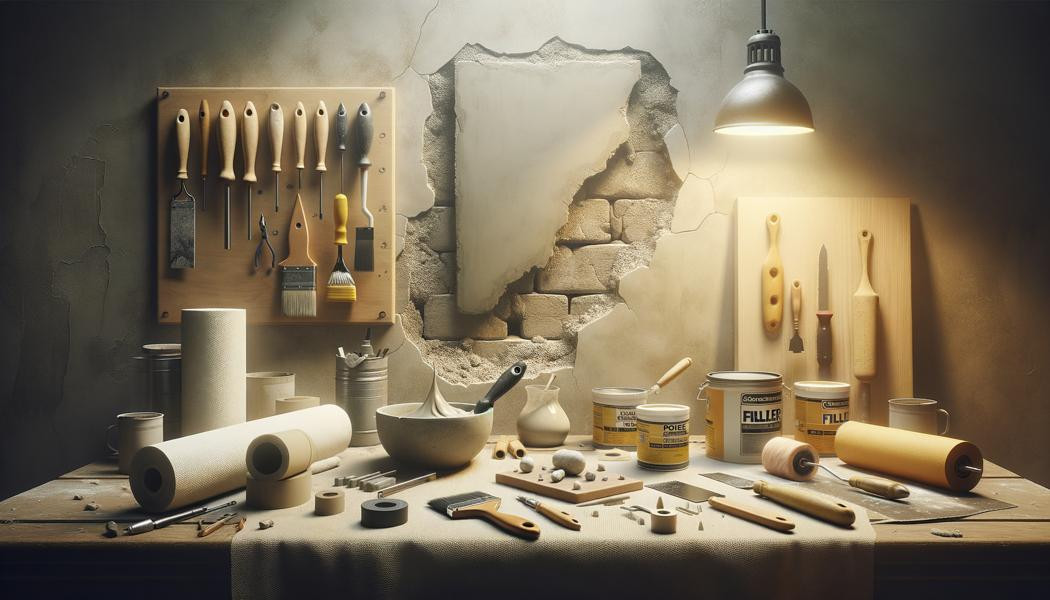
To fill a hole effectively, it is crucial to have the right tools. A spatula is essential for applying filler or plaster and for smoothing the surface. Choose a good-quality spatula that fits the size of the hole for the best result.
Another essential tool is sandpaper. After the filler has dried, lightly sanding the surface will help you achieve a smooth finish that blends perfectly with the rest of the wall. Start with medium grit, then finish with fine grit.
A drill can be useful if you first need to remove mounted elements. It is important to ensure the area is clean and debris-free to guarantee good adhesion of the filler.
Finally, don't forget gloves, which will protect your hands when you handle chemicals, and a bucket for mixing if you're using powder products. Having these tools on hand will make the job much easier.
The spatula is essential for the even application of filler. Proper smoothing ensures the repair is invisible, especially on painted or decorated surfaces.
Use a mask and safety goggles, especially when sanding. This protects your eyes from dust and any potentially irritating chemicals.
Choosing the right filler mainly depends on the material to be repaired. For wood, a wood filler is recommended, as it adheres well and can be sanded and painted easily. For plaster walls, a patching plaster is often the best option, because it dries quickly and allows for easy sanding.
For holes in concrete or masonry, choose a repair mortar. This product is specifically designed to resist moisture and mechanical stress. It's also important to check the product specifications to ensure it's suitable for the intended use.
Fast-drying products can be a valuable asset for urgent repairs, but be sure to follow the manufacturer's instructions carefully. If in doubt, don't hesitate to ask for advice in a specialized store.
Finally, for large repairs, consider requesting a professional-grade product that ensures greater durability and a high-quality finish. Recommendations and online reviews can also help you make the best choice.
Wood filler is ideal for repairs on wooden surfaces, allowing for a finish that can be easily painted or varnished.
Patching plaster is essential for plaster walls and enables quick and effective repair of holes and cracks.
Before applying filler or plaster, it is crucial to properly prepare the surface. Start by cleaning the area around the hole, removing any dust, flaking paint, or debris, which will allow products to adhere better.
Next, slightly widen the hole with a tool to remove any rough or cracked edges. This creates a better adhesion surface and allows the fill to seep into crevices for a stronger repair.
For damp walls, let the area dry out with fresh air to avoid trapping moisture under the fill. If necessary, you can apply a sealer before filling to prevent possible future damage.
Finally, make sure the environment is dry and well-ventilated when applying your filler product, whether indoors or outdoors.
Careful cleaning prevents debris from being trapped in the filler, which can cause imperfections.
Letting the area dry is crucial, especially if it has been affected by moisture, to ensure optimal product adhesion.
For a successful application, start by mixing your filler or plaster according to the manufacturer's instructions. Use a spatula to fill the hole, applying enough pressure to fill empty spaces thoroughly.
It is essential to apply the product in thin layers, smoothing at each stage. This allows you to control the texture and avoid cracks once the product is dry. Be patient and avoid overloading the hole at once.
Once the first layer is dry, lightly sand the edges to blend the repair into the surrounding wall. Then, apply a second layer if necessary, and allow it to dry completely for the best result.
Finally, after the final drying, make sure the surface is both smooth and even before applying paint or any other finish.
Applying filler or plaster in successive layers ensures better adhesion and a smooth final finish.
Sanding after drying is crucial to make sure the surface is perfectly flat and ready for paint or coating.
To obtain an invisible finish, the secret lies in patience and attention to detail. After applying the filler, use a spatula to thoroughly smooth the product so it blends evenly with the surrounding surface.
Once the product is dry, begin sanding with extra-fine sandpaper to remove any irregularities. Be careful not to sand too deeply, to avoid revealing the repair.
Next, apply a primer coat before painting. This helps unify the texture and color of the wall, and allows the paint to adhere better. Take care to choose the right finish so it matches the rest of the surface.
Finally, feel free to use a custom paint pattern to your wall for a perfectly camouflaged repair. Craftsmen often recommend doing a paint test before final application.
Taking the time to let each layer of filler dry ensures a durable, invisible finish.
Selecting quality primer and paint helps guarantee your repair work is both durable and pleasing to the eye.
One of the key points to consider when choosing your filler is the location. Fillers for indoor use are generally finer and designed for domestic use. They dry quickly and are easy to sand.
However, outdoor fillers are formulated to withstand a variety of weather conditions and are often waterproof. They contain components that prevent mold growth and ensure long-lasting durability.
For surfaces exposed to the elements, it is crucial to use an outdoor filler to avoid early deterioration. These products may be thicker and sometimes require a different application technique.
In summary, it is essential to choose your product according to the environment where the filling will be done to guarantee a result that stands the test of time.
Indoor fillers are ideal for home repairs, offering good adhesion and fast drying.
Outdoor fillers ensure durability against weather and offer protection from moisture.
To ensure optimal drying, ventilation is a key factor. Make sure the area is well-aired to allow moisture in the filler or plaster to evaporate. Leaving windows open or using a fan can help this process.
Room temperature also plays a role. It is best to apply fillers at moderate temperatures, between 15 and 25 degrees Celsius. Avoid extreme temperatures that could affect the drying process.
Finally, don't be impatient and respect the drying time recommended by the manufacturer. Testing the area after the required time is advised before moving on to further steps like sanding or painting.
By following these guidelines, you will maximize the lifespan of your repair.
Ensure the room is well ventilated for fast and effective drying.
Maintaining a suitable temperature promotes optimal hardening of the products used.
One of the most common mistakes is neglecting surface preparation. Skipping this step can lead to poor filler adhesion, which weakens the repair.
Another frequent mistake is applying too much product at once. This can cause air bubbles or uneven wear. Apply thin coats and let each one dry thoroughly to achieve a successful finish.
Also, avoid using inappropriate products for the material to be repaired. Choosing wood filler for a plaster wall, for example, will harm the quality of your repair.
Lastly, don't neglect cleaning after application. Filler residue on tools or surrounding surfaces can make the finish look unsightly.
Preparation is essential to ensure the success of your repair.
Apply thin layers to avoid complications during drying.
The maintenance of repaired surfaces is crucial to guarantee their longevity. Regularly inspect repaired areas for any cracks or discoloration. If problems appear, don’t hesitate to touch up with the same type of product used initially.
Consider also repainting repaired areas so that they match the rest of the surface. Use a primer for good adhesion and avoid texture differences.
Finally, do not allow moisture to seep into repaired areas, as it may cause underlying damage. Make sure your home is well ventilated and check indoor humidity levels.
Thus, by taking care of your repairs, you will ensure your surfaces remain neat and durable.
Regularly inspect repairs for any signs of deterioration.
Perform touch-ups by following the initial process to ensure aesthetic continuity.
For drywall walls, use a filler specially designed for this material. The method is to apply the product, then sand for a smooth finish. Don't hesitate to use mesh for large holes to reinforce the structure.
In concrete, a repair usually requires a suitable mortar, which should be applied in successive layers. Respect drying times between each layer for increased durability.
As for wood, be sure to thoroughly clean the area before applying a wood filler. For larger repairs, considering replacing the damaged part may be a better option if it reduces the risk of rot.
Whatever the material, the most important thing is to follow the product instructions and use techniques suitable for each type of surface to achieve a flawless result.
Using the right products and installing reinforcements for large holes is essential for a durable repair.
Mortar is often the best solution for solid, long-lasting repairs in concrete walls.
Using quality tools is essential for achieving a professional result. Tools that are not well suited can make the job much more difficult and reduce the quality of the repair. For example, a sturdy plastic spatula won’t leave marks or irregularities after application.
Furthermore, quality tools can improve user comfort, reducing fatigue during long hours of work. It also contributes to safety, as worn-out or poor-quality tools can cause injuries.
Investing in good tools also pays off in the long run. It will reduce the need for frequent repairs and allow you to carry out higher-quality projects.
Finally, quality tools often give you greater confidence in your abilities, encouraging you to take on more ambitious projects in the future.
Using appropriate tools ensures a much higher quality finish.
The right tools deliver not only better safety but also more comfortable use for your DIY projects.
Filling a hole may seem like a simple task, but it requires the right knowledge and skills to ensure a quality result. Whether you're a beginner or an experienced DIYer, it's essential to take the time to assess the situation, choose the right tools and materials, and follow a rigorous process. From preparation to application, every step is crucial for achieving an invisible and long-lasting finish. Therefore, always keep in mind that a job well done begins with good preparation and expertise.
Whether you need quick help or want to offer your services, Helplease is your solution! Download the app to access qualified experts or find clients in just one click, and simplify your daily life! Available on iOS and Android!