
As part of interior renovation, installing a backsplash is a crucial step to bring both aesthetic and functional appeal to your kitchen. In 2025, the tools needed to successfully complete this operation are varied and adapted to different types of materials. This article covers the essential tools for a perfect installation, choosing backsplashes according to your kitchen style, as well as the step-by-step procedure to ensure optimal results. You will also discover common mistakes to avoid, trending materials for 2025, and many other practical tips to perfect your backsplash project.
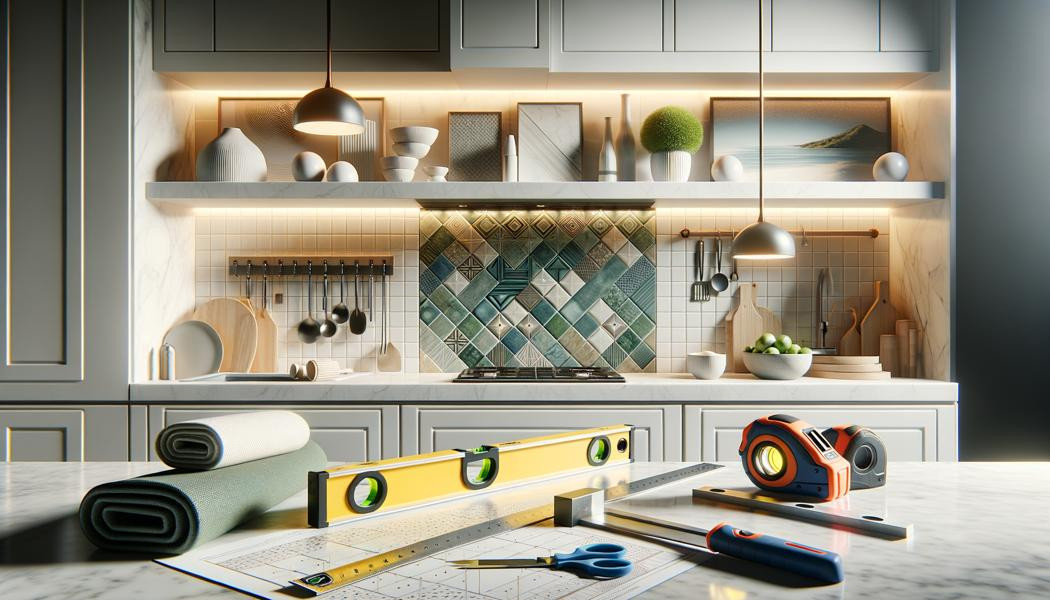
Do you need help installing a backsplash? Quickly find a qualified professional on Helplease and benefit from a tailor-made service to meet all your needs. Discover professionals near you!To achieve a perfect backsplash installation, it is imperative to have the right tools. The essentials include a drill, a utility knife, a spirit level, and a tape measure. The drill will make it easier to fix the elements, while the utility knife will be useful for cutting the backsplash panels to the right size. A spirit level is essential to ensure everything is perfectly straight, and a tape measure allows for accurate measurements.
In addition to basic tools, it can be wise to equip yourself with a glue gun for adhesive backsplashes. For those opting for tile, specific tools such as a mosaic nipper and a rubber mallet will be necessary for fine and precise adjustments. Safety is also paramount: protective gloves and safety glasses should be an integral part of your equipment.
Finally, it is important to plan for a clear workspace to facilitate the handling of materials and tools. Good lighting is also recommended to avoid mistakes while cutting and installing.
*(Feel free to complete your tool kit with accessories such as sponges and cloths for cleaning after installation.)*
Measuring tools are crucial for a successful installation. A tape measure will allow you to take precise measurements of your wall before installation, while a spirit level ensures the backsplash will be straight and level.
Various cutting tools, such as a hacksaw or a utility knife, are needed to adjust the size of the backsplash to your wall dimensions. These will let you achieve clean and precise cuts.
Professionals, looking for more clients? Sign up on Helplease today to offer your services and grow your business. Access a broad customer base in just a few clicks!The choice of a backsplash should reflect the style of your kitchen while being functional. For a modern kitchen, glass backsplashes or stainless steel can add an elegant touch. Conversely, for a more traditional style, tile or wood backsplashes bring warmth and rustic charm.
It is crucial to consider the color and patterns of your backsplash to ensure it harmonizes with the rest of the kitchen. For example, a colorful mosaic backsplash can become a focal point in a minimalist white kitchen. You can also opt for plain tile that pairs well with natural wood cabinets.
Also, think about the durability and maintenance required for different materials: some options need more frequent cleaning than others. It may be wise to choose stain-resistant, easy-clean surfaces, especially in a kitchen where meal preparation takes place.
Finally, do not hesitate to consult a professional to help you choose the backsplash that best fits the dimensions and style of your kitchen.
Different kitchen styles play a key role in your backsplash selection. Whether you have a contemporary, industrial, or rustic kitchen, there are many materials and finishes to suit every aesthetic.
The colors and patterns of your backsplash should complement your kitchen’s palette. Consider how to harmonize colors between the walls, cabinets, and backsplash to create a coherent mood.
If you need an expert for your specific needs, visit Helplease and discover providers available near you. Make your life easier and find the right professional!Installing a backsplash requires a methodical approach to guarantee a flawless result. Start by preparing your workspace: make sure the wall surface is clean and dry. Then, take precise measurements to know where to make your cuts.
The first step in the process is to mark the backsplash location on the wall with a pencil for better visibility. Next, cut your backsplash to the desired size, according to your previous measurements.
Then, apply the glue or adhesive to the wall using a notched spatula, which allows for better adhesion. Next, carefully place the backsplash, using a spirit level to ensure it is perfectly straight. If you opt for a tile model, start from the bottom up.
Finally, allow the glue to dry for the period recommended by the manufacturer before cleaning any excess glue with a damp sponge.
Before any installation, it is essential to clean the wall surface for good adhesion. Check for dust, moisture, or residue that could impact the backsplash installation.
The cutting must be precise for a perfect fit. Follow the markings on the wall and apply the glue carefully to avoid excess. Once the backsplash is installed, make sure it is properly aligned.
When installing a backsplash, there are several mistakes to avoid for optimal results. One of the most frequent errors is not measuring correctly. Inaccurate measurements can lead to improper cuts and visible joints. Before cutting, it is critical to double-check measurements.
Another common mistake is neglecting wall preparation. A dirty or uneven wall can compromise the adhesion of the backsplash. Take the time to clean the surface properly and make it level if needed.
Furthermore, it is important not to use an inappropriate adhesive for your backsplash material. For example, some adhesives work better with glass surfaces, while others are designed for tile or wood.
Finally, a common mistake is rushing the installation of the backsplash. Take your time applying the adhesive and adjusting the backsplash to ensure a perfect level.
Taking incorrect measurements can lead to improper cuts. Always use a level and a tape measure to ensure accurate dimensions.
A poorly prepared wall can affect the adhesion of the backsplash. Take the time to assess the condition of your wall before starting.
Backsplash materials are evolving with trends and innovations in 2025. Glass backsplashes are very popular for their modern look and easy maintenance. Glass also provides a wide range of textures and finishes, allowing for a customized design.
Tiled backsplashes remain a classic option, appreciated for their durability. This material is available in various patterns, sizes, and colors, letting you match any kitchen style.
On the other hand, stainless steel backsplashes are also seeing a resurgence of interest, particularly in modern kitchens. Stainless steel is not only attractive but also highly resistant to heat and moisture.
Finally, eco-friendly materials are gaining traction. Backsplashes made from recycled materials, such as cork, provide a sustainable alternative while also being stylish and unique.
Glass backsplashes are prized for their sleek, modern look. They come in various finishes, including lacquered or satin, and are easy to clean, making them practical in a kitchen.
Tile offers a wide variety of styles and patterns. It is easy to maintain and very durable, making it a timeless choice for many kitchens.
Wall preparation is a crucial step before installing any backsplash. Start by cleaning the surface to remove any dirt, grease, or dust. If your wall has irregularities, consider correcting them with putty or plaster to achieve a smooth surface.
Next, ensure the wall is dry. Make sure there is no moisture, as this could compromise the grip of the backsplash. Use a dehumidifier if necessary to eliminate excess humidity.
After that, marking the backsplash location on the wall with a pencil will show where to apply the adhesive. These markings should be made carefully to guarantee precise placement.
Finally, once the surface is prepared, you may apply a bonding primer if you are using specific materials such as glass, to ensure better glue adhesion during installation.
Before applying the backsplash, it is essential to thoroughly clean the surface to guarantee good adhesion. This includes removing any dust and greasy residue.
Be sure the wall is completely dry before installation. Any remaining moisture can negatively affect the backsplash installation.
Selecting the right glue or adhesive is just as crucial as choosing backsplash materials. For glass backsplashes, a specific glass adhesive is recommended to ensure a strong hold. This type of glue is specially formulated to prevent slipping and guarantee lasting fixation.
For tiled backsplashes, a tile adhesive mortar is often the best choice. This product provides optimal grip while allowing minor adjustments during installation. There are also versions suitable for damp rooms—ideal for kitchens.
For wood backsplashes, a good tile cement or a special wood glue will make sure your backsplash stays in place over the long term while preserving the material’s integrity.
Finally, do not forget to follow the manufacturer’s specific instructions regarding drying and application. This will ensure optimal adhesion and a flawless installation.
Glass adhesives are specially formulated for reliable fixation. They are easy to use and allow for adjustments during placement.
Mortar adhesive is ideal for tile, offering excellent grip and long-term durability.
To achieve a professional finish, it is essential to take your time during installation. Ensure each step, from measuring to adhesive application, is carefully checked. Working with precision will reduce the risk of mistakes that could ruin the final appearance.
Also, make sure to use a spirit level to guarantee the backsplash is straight. This is especially important for materials like tile, where uneven alignment will be very noticeable.
Using finishing joints can also provide a tidy, professional look. These joints mask imperfections and contribute to the installation’s watertightness.
Finally, clean any adhesive overflow immediately after application, as this is easier to handle than waiting for it to dry, which could leave difficult-to-remove residues.
It is crucial to take your time to ensure a neat and precise installation. Do not rush and check every detail during the process.
Finishing joints help to hide imperfections and ensure better watertightness, thus increasing your backsplash’s durability.
Proper maintenance of your backsplash will guarantee its longevity and appearance. For glass backsplashes, a mild cleaner and a microfiber cloth are usually enough to remove fingerprints and splashes. Avoid abrasive products that could scratch the surface.
For tiled backsplashes, a standard tile cleaner is recommended to prevent grease or dirt buildup. Consider resealing the tiles every few months to maintain joint integrity.
If you have a stainless steel backsplash, clean it regularly with a specific stainless steel cleaner to prevent streaks and dullness. Using a soft sponge is recommended to avoid scratching the material.
Finally, it is wise to plan regular cleaning to avoid the build-up of grime. This will make day-to-day maintenance much easier.
Choose non-abrasive cleaners that will preserve your backsplash’s finish while ensuring effective cleaning.
Establishing a regular cleaning routine will help maintain your backsplash’s appearance and prolong its lifespan.
Custom backsplashes offer several advantages compared to standard models. Firstly, they fit perfectly to the dimensions and layout of your kitchen, eliminating uncovered spaces and leaving less room for dirt and dust.
Moreover, custom designs allow you to add a unique touch to your kitchen, reflecting your personal style and preferences. This can be especially important if you want to create a coherent ambiance in your living space.
Custom backsplashes can also be made from high-quality materials and finishes, guaranteeing not only aesthetics but also durability.
Conversely, standard backsplashes, although often less expensive, may not address your exact needs or those of your space, which can lead to future installation or maintenance issues.
Custom backsplashes fit your kitchen perfectly, avoiding uncovered gaps.
They allow you to achieve a unique and personal aesthetic, far from standard models.
Integrating decorative elements can add character to your backsplash. You can consider installing mosaic patterns or color inserts that contrast with your main backsplash color for an appealing visual effect.
Integrated LED lighting behind or above the backsplash can also provide a unique ambiance while improving your work area’s lighting. This can turn a simple backsplash into a true focal point of the kitchen.
Suspended shelves, combined with your backsplash, also enable you to create a personal style by displaying dishes or decorative objects.
Take time to consider these decorative elements and their placement to maximize their visual impact and functionality.
Mosaic patterns or raised elements can offer a touch of sophistication and enhance your backsplash’s character.
LED lighting added to your backsplash will create a warm ambiance and highlight your kitchen area.
In 2025, several trends are shaping backsplash installation. Firstly, the use of sustainable and recycled materials is on the rise, responding to a growing need for a more ecological lifestyle.
Minimalist designs are also gaining popularity: clean backsplashes with scant patterns and neutral colors may create a modern, elegant atmosphere in many kitchens.
Smart backsplashes, integrating technologies such as anti-stain surfaces or connected features, are beginning to appear. This not only makes maintenance easier but also brings a high-tech touch to the kitchen.
Finally, personalized decorative elements such as illustrations or artwork incorporated into the backsplash are becoming more common, reinforcing the individuality of kitchen spaces.
Eco-friendly options, such as backsplashes made from recycled materials, are increasingly favored.
New technologies allow materials to offer improved features for maintenance and practical use.
Installing a backsplash is a key step to transforming your kitchen into a modern and functional space. In 2025, whether through material choices, installation techniques, or decorative elements, it is essential to stay informed about trends and the necessary tools to guarantee a successful project. By taking time to carefully prepare your space, choosing quality materials, and following proper installation steps, you will enjoy an attractive and durable result that will enhance your kitchen for years to come.
Whether you need quick help or want to offer your services, Helplease is your solution! Download the app to access qualified experts or find clients in one click, and simplify your daily life! Available on iOS and Android!